VPN or Virtual private network allows you to have online privacy as an online network is created which is private. If you are using public Wi-Fi, using a VPN could keep you secure on the web, from hackers and information leakage. This is why many people want to know how to make a VPN.
If you are looking to make a VPN on your mobile then follow the link.
How to make a VPN in Windows 10?
For this, you must be subscribed to a service or you must have a free VPN service. There are many options that you can choose from. Also, you should determine which protocol you want to use. Make sure that you use the securest protocol. Try to stay clear of PPTP.
- Open the Start Menu and go to Settings.
- Select Network & Internet. Then, go to VPN.
- Select ‘Add a VPN Connection’. Open the dropdown menu that is below VPN provider.

- Click on Windows and then on Connection name.
- Write the VPN connection name.
- Click on the Address section. It might be written as ‘Server name’.

- Write the address of the server. This will be present in your VPN account.
- Look for a VPN type and open the dropdown menu that is below it.
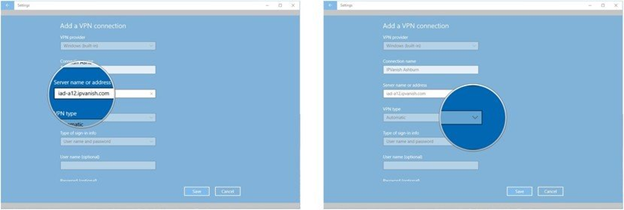
- Then, you have to select a Connection Protocol.
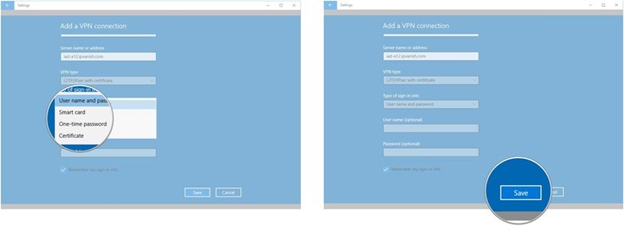
- Open the dropdown menu present below ‘Type of Sign-in’.
- It depends on your VPN provider which method you choose.
- Click on Save.
- In your VPN list, you will be able to see your VPN. Click on it and then click on Connect.
- You might have to write the account name and password.
You are now connected to VPN in Windows 10. The process is quite simple but you just have to follow all the steps right.
How to Make a VPN in MAC?
In order to make a VPN in Mac, go to Menu and then to System Preferences. From there, go to Network. At the bottom, you will see a + sign. Click on it and then click on the button that is in front of Interface. It will show you a small menu.
From here, choose VPN and then click on the button in front of the VPN type. Choose the VPN type. When you sign up for any VPN service, they tell you the type. In the next step, you have to set a name for this network. This will be the ‘Service Name’.
When you click on ‘Create’, you will see the settings for your new connection. In the server address, type the address. Write your account name and then check the option at the left bottom plane named ‘Show VPN status in menu bar’.

- Then, click on Authentication Setting.
- Your VPN provider would have given you the instructions for setting up this method.
- If you have a username and password, use that to proceed.

- Then, click on Ok.
- Select Advanced. It will open a window.
- Here, place a check on ‘Send all traffic over VPN connection’.
- Click on Ok. Then, click on Apply.
Now, you will be able to see a new icon at the top of the screen. This indicates the status of your VPN. From here, you can quickly connect and disconnect from your connection.
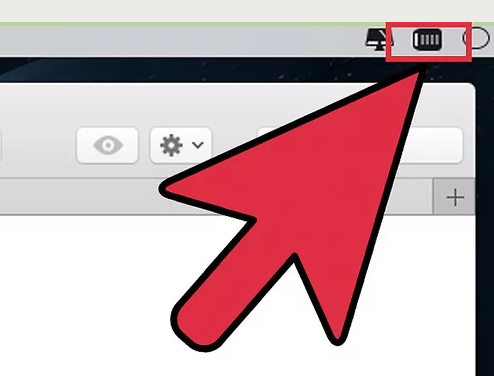
When you need to connect to VPN, click on this and then type in your information to Connect.
How to make a VPN in UBUNTU?
To set up a VPN on UBUNTU, follow the steps given below.
- Go to Activities and write Network.
- Open Network.
- At the bottom, you will see a + sign. Click on it to establish a new connection.
- In the Interface section, select VPN.
- Then, select the type of VPN connection.
- You will see a window asking you for VPN details. Fill it in and then click on Add.
- After this is done, go to System Menu on the right side and click on VPN.
- For this, you will need a password. Type your password and proceed.
- An icon will appear on the top panel. Click on it to connect to the VPN connection or Turn it off as you require.
How to make a VPN in Raspberry Pi?
You can also use Raspberry Pi as a VPN connection. This is quite beneficial as you will be able to connect many devices and use the connection at a cheaper cost. It also consumes less power so it is an ideal choice. To start this process, you will need Raspberry Pi 2 or 3. Along with that, you will need Ethernet Cord or a dongle and a micro SD card.
After you have all the supplies, you need to decide if you are going to use a dynamic or static IP address. Static IP address is easy to work as extra steps are not involved. For a dynamic IP, you will need a Dynamic DNS servicer.
If you are using a dynamic DNS server, you will have to decide if you want to use a free name or your own domain name. CloudFlare is a great service for people who want to use their own domain name while people who want to go with a free one can use no-ip.org. Then, you have to port forward the port 1194 for open VPN software. Use the UDP protocol for this port.
Start this process by using an install script PiVPN which does a lot of work for you so that you do not end up making many mistakes in the VPN set up process.
- Since this will be the default user, you will have to change the password.
- After changing the password, you can proceed.
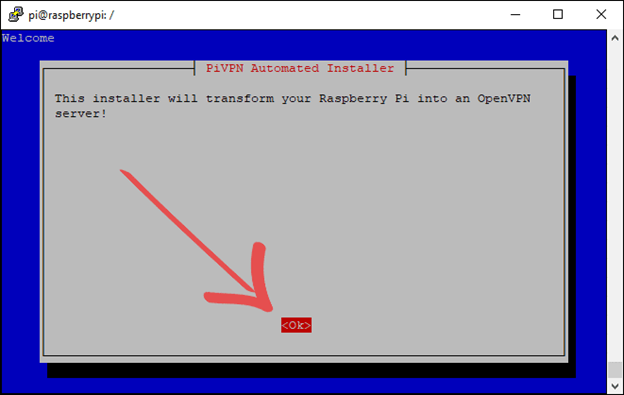
- Type in the command: curl -L https://install.pivpn.io | bash
- You will see a screen that tells you that this installer will turn you Raspberry Pi into a VPN server. Click on Ok.
- On the next screen, click on Ok.
- Then, you will see another screen that asks you about the settings. Click on Yes, if you like the settings and No if you want to change them.
- The next screen will be the warning screen. Click on Ok.
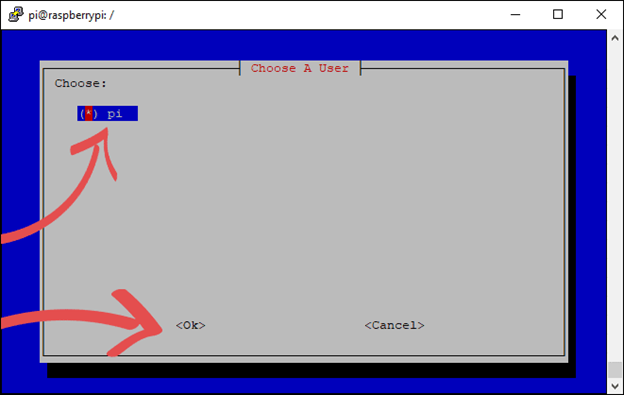
- Again, click on Ok and this screen tells you that you will have to set up a local user.
- On the next screen, you will see the user options. Choose Pi and then click Ok.
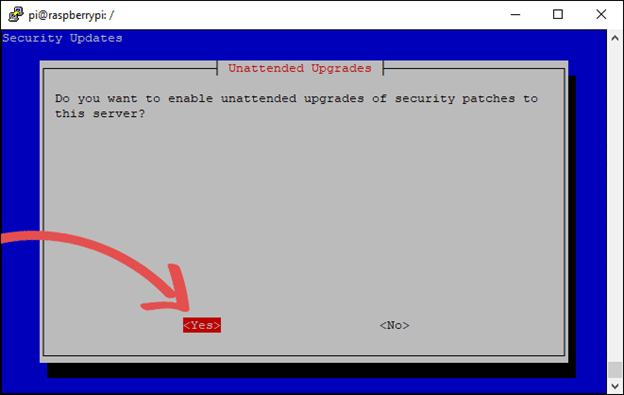
- You will proceed to another screen. Read the information and click Ok.
- On the next screen, choose Yes. You could use No too but this leads to some risk for your home network.
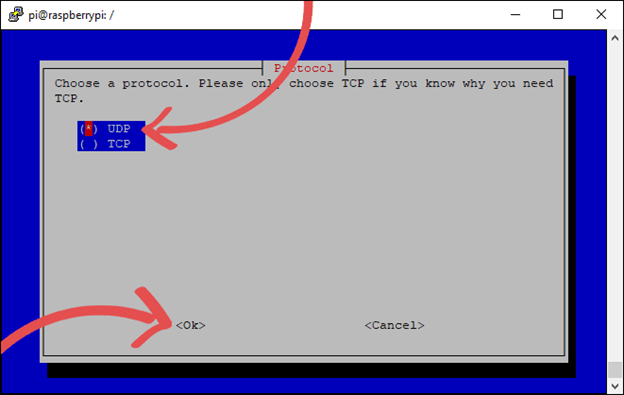
- Now, you have to choose a protocol. We already mentioned above that you have to select UDP.
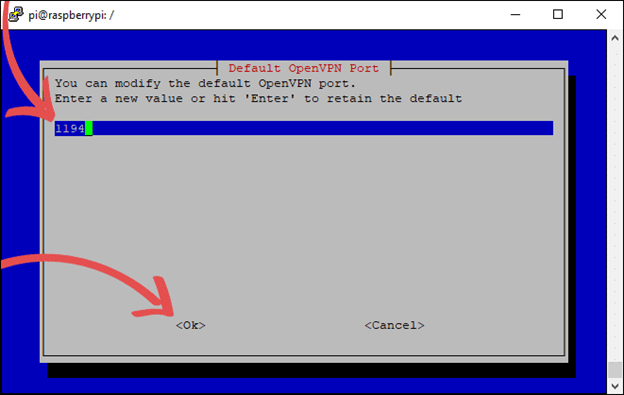
- Choose the port on the next screen and write 1194.
- The next screen will ask you if the settings are correct. Select yes.
- Now, you have to choose the encryption key size. Choose 2048 bit encryption as it provides maximum protection without compromise on speed.
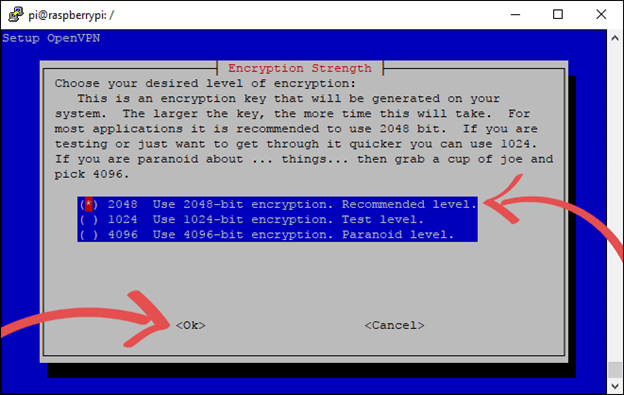
- Click Ok on the next screen.
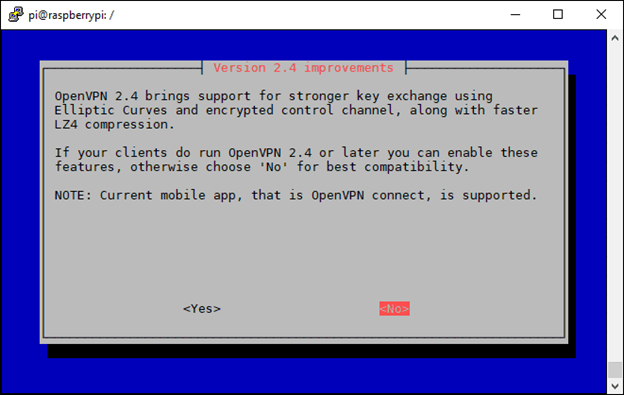
- The next screen will ask you if your VPN software has compatibility for OpenVPN. Depending on which VPN you are using, choose your option.
- After this, you have to select the IP address. Depending on which one you are using, select it from the screen and then proceed.
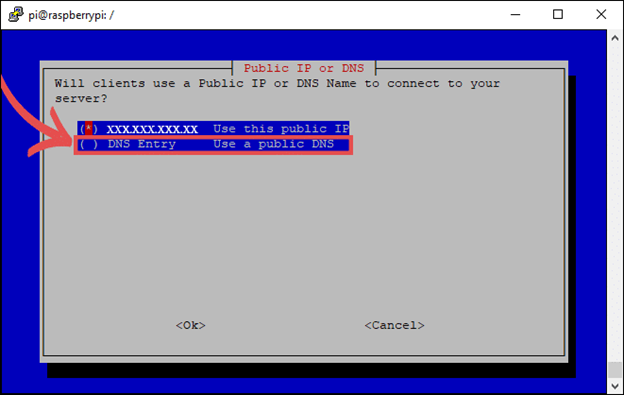
- Then, you have to write in the DNS name that you should have set up beforehand.
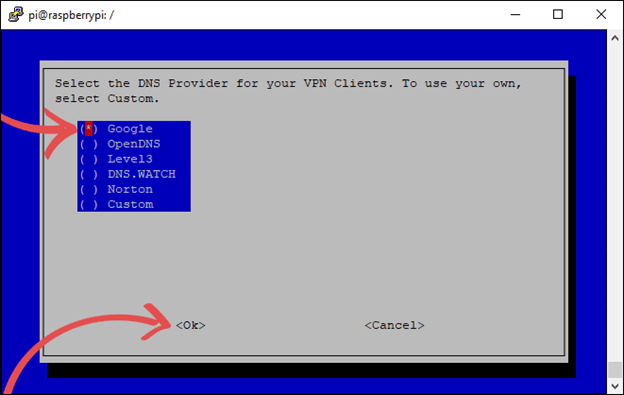
- Choose the DNS provider from the next screen. You can use Google’s DNS server or any other. It is up to you.
- With this, your VPN connection is set up.
- The next screen will tell you to reboot. Select Yes and let the reboot begin.
Hopefully, this guide would have helped you in learning how to make a VPN in different ways. You can use these methods to set up a VPN on any of your devices.
Recent Comments